CiviCRM 101: Using your online database (CiviCRM 3)
CiviCRM is a Customer Relationship Management database system. It works similar to Access or other such databases, except that this system is available online instead of residing on one person's computer.
This CRM allows multiple people to have access (if you choose to) via individual user names and passwords. It is also available anywhere you have internet access.
The benefit of a system like this is that multiple people can easily have access, duplication of information across multiple files is no longer an issue, and you can have access from anywhere with internet access - not just at the computer with the database.
Many campaigns and organizations find that they end up with multiple copies of their lists/databases/spreadsheets, each with different information. One person makes a copy so they can have one on their computer, they input information into that file, and now you have two different files. And the longer your organization has been around, the more such files you're likely to have.
This CRM allows you to import all the information from your spreadsheets and databases and store it in one, easy to access place. You can even export it into a file in case you need to take it somewhere without internet access.
Also, you can allow people to update their own information, if you choose.
Setting up CiviCRM can be difficult, as there are many settings that have to be done to ensure that your installation works. As such, it is recommended to get someone who knows CiviCRM to help you with this.
CiviCRM allows you to collect information, such as from volunteer and sign up forms, take online donations (when connected to a merchant account service), allow people to sign up for memberships, have paid events, and more. Future versions of the software will have additional features.
CiviCRM has also recently added a free how-to book as well.
How to guides coming soon.
Add a membership type to a record
If you have someone who has already gone through the process of registering for an account on your site, a record will automatically be added inside CiviCRM. Inside it at a minimum will be their email address. If you have attached other CiviCRM profile fields to your Drupal registration, those will be in their CiviCRM record as well.
Now how do you add a membership to a record inside CiviCRM?
Go to CiviCRM in your site.
Click the "Search" menu and choose "find contacts". This will give you the simple search from for your database.
Input their name (if you collected it on your form) or email information into the search box. Then click search. You do not need to change the settings on any of the other drop down boxes. Note: You can leave the box empty and click search, which will bring up all records in your database.
On the search results page click on the name of the person you want to add a membership to.
This will bring up the record for that person.
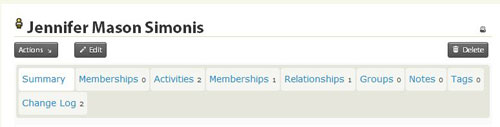
Note: If you aren't taking contributions and have replaced the word "contribution" site-wide with the word "membership", you may have two tabs that say "memberships". When we talk about the "Memberships" tab, we mean the second one.
Click the "Memberships" tab.
This will bring up all membership information for this record.
Click "Add Membership".

On this page you can choose the membership type, when their membership begins, when it ends, etc. Just fill out the form and then click the "Save" button at the bottom of the screen.
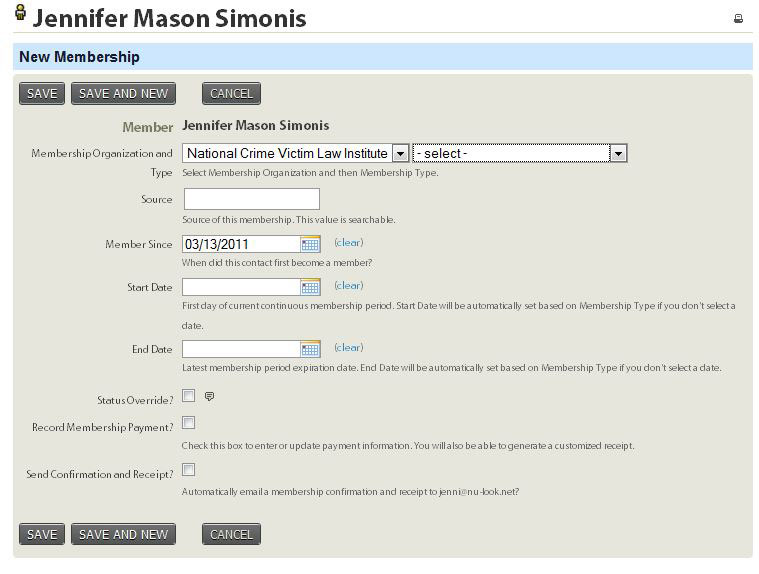
This membership is now added to the record.
If you have permissions on your Drupal site that are assigned based on Memberships, you may want to manually sync the Drupal and CiviCRM data so the permissions are added immediately. Otherwise on most sites it will not happen until the person logs out and then logs back into the site.
To manually sync everything, go back to your Drupal menu. You can do this by clicking the "Home" menu item and choosing "Drupal menu".
Under "Site Configuration" choose "CiviMember Roles Sync". Then choose "Manually Synchronize".
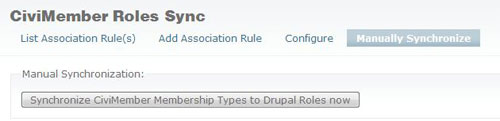
By clicking the button on this page, any changes you made regarding membership in CiviCRM will be synced to roles and permissions on your Drupal site. You can run this anytime you make changes or you suspect that the automated sync has not run.
CiviCRM's components
There are several parts to CiviCRM, including the base CiviCRM features, CiviMail, CiviContribute, CiviEvent, and CiviMember.
CiviCRM
CiviCRM allows you to collect, organize, and work with information on donors, customers, contributors, members, etc.
There are a number of default fields that come standard in CiviCRM, including first name, middle name, last name, street address, city, state, postal code, etc.
You also have the ability to create other fields, which can be a text line, text area (multiple lines), radio boxes (multiple choice where you can only select one), checkboxes (where you can select multiple items), etc. These additional fields will then be available on a person's contact record.
With CiviCRM, you can search through the records, edit people's records, and add new ones.
Because it is a relationship management database, you can also add relationships to people such as "child of", "spouse of", "employee of", etc.
CiviMail
The CiviMail system allows you to send out bulk emails to people in your database. You have the option of sending to everyone, to groups you have set up, etc.
The sending of emails is done through your web browser and includes an html and text version of the email. The system tracks how many emails are opened and/or forwarded, handles unsubscribes and more.
If you are running a newer version of CiviCRM 2.2+, it is now easier to use CiviMail on a shared hosting system. However, you must still follow the rules set forth by your host. Some hosts have very low limits for how many emails total can be sent from your domain per hour, which can make it difficult to use CiviCRM. We highly recommend checking with your web host before using CiviCRM, as you could block your ability to send emails from your personal account on the domain because you used your quota through CiviMail. Even worse, you may violate your host's terms of services and end up with your site deactivated.
You will also need someone with advanced CiviCRM skills to help you set this up so the appropriate cron scripts can be turned on so that emails are sent and unsubscribes/opt-out/tracking information is received.
CiviContribute
CiviContribute allows you to take donations online. It will collect any information you tell it to, which is great for candidates and political groups who need to collect specific information on donors in order to be in compliance with the law. You can also add honoree information, allow people to set up their own contribution pages for your cause, and more.
Currently, CiviCRM connects with a few merchant accounts for taking credit cards online: PayPal (website standard and pro), Authorize.net, PayJunction, Google Checkout, Moneris eSelect Plus, Elavon / Nova, WAY, PayJunction, PaymentExpress, and ClickAndPledge. As of right now, only Paypal is supported for recurring contributions. The community is working to raise the funds to be able to hire a developer to extend that ability to Authorize.net (payment processors are contributed parts of CiviCRM, not core, and as such are not supported by CiviCRM's developers). Google Checkout is limited in that only federal campaigns/political organizations are allowed to use it - they require a copy of your filing with the FEC in order to keep your account open.
CiviEvent
CiviEvent allows you to set up events where people can register. These can be paid or free events. Paid events use the same payment processors as listed above for CiviContribute.
Events can have a maximum number of sign-ups attached, allowing you to close registration once you reach the maximum number of attendees. People can also be added to waiting lists and then notified when space is available.
Multiple people can be registered at one time, making sign ups for families and such much easier.
There is currently not a way to attach workshops/breakouts to the event and allow people to choose their groups. This can be done via adding fields to CiviCRM and having those show on the registration form; however, it will not keep track of how many people are signed up for what, close items when they are full, etc. This is a feature that has been requested and may need funding to achieve.
CiviMember
CiviMember allows you to offer memberships - both paid and free. These memberships have a length of time attached to them (such as a year), and people receive renewal notices prior to their membership expiring.
This is great for non-profits and community groups that offer paid memberships as a way to fund their activities.
CiviPledge
CiviPledge allows people to pledge to donate a specific amount at a specific interval. It may be that they want to donate $15 a month every month for 6 months.
This system allows them to make their pledge, make the first contribution, and then send out reminder emails shortly before their next donation is due.
This does not automatically run those pledges - it only keeps track of them.
You will also need someone with advanced CiviCRM skills to help you set this up so the appropriate cron scripts can be turned on so that the pledge statuses will be updated and reminder emails sent.
CiviCase
CiviCase is for case management. It is a new feature of CiviCRM, and as such does not have much documentation yet.
Contributions on your site
Log into your site. Once you do, a black menu bar should appear at the top of your screen.
Please note: this is only true on sites we create. If you're not a client of ours, this might not be true if Administration Menu isn't turned on for your site.
Click on CiviCRM on your menu.
This will change the top menu from the Drupal menu to the CiviCRM menu and will load the dashboard of CiviCRM.
Click Contributions in the menu and you will be given a drop down of options.
Dashboard: gives you information about how many donations have come through, average donation, etc.
New contribution: this allows you to hand input a donation. This is a good tool for those donations that comes in via mail, by check, etc. That allows you to keep all your donation information in one location.
Find contribution: this allows you to run a search for donations. This is a handy tool once you receive a number of donations and you need to be able to view (and/or export the data for uploading to SOS). You can run a search based on date, amount, and more.
Import contributions: If you've been keeping track of your offline donations in a spreadsheet or database, this will allow you to import them into CiviCRM.
Pledges: lets you manage pledges that come through the site.
New contribution page: allows you to create a new contribution page. This can be useful if you are running a specific donation campaign.
Manage contribution pages: manage the contribution pages that are already created. This is where you'd change text on the pages, the receipt, etc.
Personal campaign pages: You can view if anyone has set up their own page to raise money for you.
Custom data - How do I add my own fields?
Custom data is used to add new fields to the database so that it meets the needs of your organization. It may be a text field, text area, checkboxes, yes/no, etc.
To add new fields, go to Administer >> Customize >> Custom data
Here you can create new data groups and then add custom fields to those groups. Once you have created the custom data fields, you will be able to use those inside profiles.
Adding and editing fields is very easy. Just choose the appropriate option - add a field or customize one already there - and then follow the options down the screen.
You can read more about custom data here and here.
Once you have added a custom field to a profile, editing the name inside custom data will not change it on the profile listing. You will need to go to the appropriate profile, edit the field, and reselect it from the drop down so that it picks up the new name.
Deleting a record
To delete a record from the database, you will need to first locate the record. It is easiest to do this by searching the database (instructions can be found here).
After you get the listing of records that match your search query, select the record you want to delete.
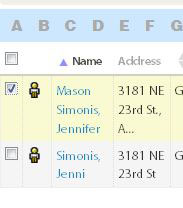
Choose your desired action from the "actions" drop down above the listing of names.
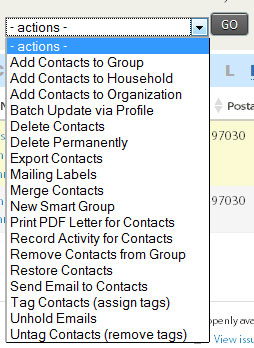
If you know you are not going to need to bring this record back, choose "Delete permanently" from the listing of actions. If you don't choose this option, the data in this record can still show up in places, such as listings of contacts you've pulled from the database.
Click the "go" button.
You will be asked to confirm this deletion.
Click the "Delete Contact(s)" button.
The contact is now deleted from the database.
Download contribution information
Log into your web site.
Hover over the "CiviCRM" link at the top of the page in the black menu bar.
Click on CiviContribute on the drop down that appears.
This will give you the most recent contributions that were attempted on the site.
Scroll to the bottom of the listing and click Find More Contributions.
If you don't see this at the bottom, then go up to the menu at the top of the page. Hover over CiviCRM, go down to CiviContribute, and choose Find Contributions on the menu.
Here you can set the items you want to search upon. Once you do your first download, you'll likely want to use the date function so that you don't have to download all the transactions every time.
This will bring up the entire list of contributions that meet your specifications.
Next to "Select Records" choose all records.
Just below that under the More Actions drop down, choose export. Hit Go.
Your first time to do this:
The first time you do this, you'll need to select "Select fields for export." Then on the next page you'll have to choose your fields. Name, address, and the like will be listed under Individual. Contribution date, amounts, etc. will be listed under Contribute.
Click Save Field Mapping.
Give it a name and description.
Click Export to export the file.
You'll get a .csv file that can be opened in Excel or other spreadsheet software.
Be sure to come back to your web browser and select Done so that your mapping will be saved.
Exports with a mapping:
Choose Use Saved Field Mapping. Choose Contribute. Hit Continue.
This will show you the fields that are being exported.
Click the Export button.
You'll get a .csv file that can be opened in Excel or other spreadsheet software.
Download information to Excel
CiviCRM makes it very easy to export information into Excel (or any other program that can handle csv files).
Go to the CiviCRM area of your site.
Click on the "Search" menu at the top.
Choose advanced search, as you will get the most options this way.
Choose what options you want to search upon.
Any custom fields you have added to your site will be listed down under a section entitled "Custom fields"
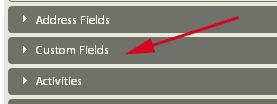
If your field isn't available there, then it has not been set to be searchable.
To make a field searchable:
Go to the "Administer" menu in CiviCRM.
Select "Customize"
Select "Custom Data"
Locate the data you want to make searchable. It will be located in one of the field groupings found on this page.
...Back to the search
Choose everything you want to search on and hit search at the bottom.
The next page will bring up all records that match your search terms.
Choose the radio button to select all the records.
From the drop down choose "Export Contacts" and then click "go".
On the next page you'll be given options regarding what to export. Primary fields are things that come standard with CiviCRM, such as name, address, email, and phone. You can also choose the fields yourself.
If you choose to select the fields yourself, you can "map" it so you can use this same list of fields again.
After you choose what fields to export, hit the button to continue and it will download the records into a csv file for you.
Profiles - How do I create forms?
Profiles are what is used to build forms such as contribution pages, membership sign-ups, registration for your site, and more. They can be set up as standalone pages (create a profile page and then grab the standalone form code and put into a page) or can be used as part of one of CiviCRM's components, such as CiviContribute.
When it's part of one of the components, you add the profile as part of the set up of that page. It gives you the option to add up to two profiles to the page. I'd rather you have the option for more, but that is all it gives you.
When it's added as a standalone page, you first create the profile. Go to Administer >> Customize >> CiviCRM Profile
There you can create a new profile or add to one that is already there. There is a good amount of information on profiles here. There is also information on profiles here.
You can add fields that are standard to a profile as well as those you create yourself. It's pretty easy to do - just pick what kind of contact the field is assigned to (is it something like "first name" that would only be for an individual or an address which would be for all "contacts", for instance), choose your options - such as whether it is required - and then submit the page.
Once your profile is done, you can grab the html code to paste into a Drupal page. Just click on "more" to the right of the profile's name on the profile listing page. Then choose "html form snippet". This will give you all the html code you need to add this to a page. Please note: If you are using these snippets and then change the form, it can break the code you are using elsewhere since it does not automatically update your custom page.
You can change the label for a field in your profile without affecting the field's name anywhere else. Just edit it inside the profile. This can be handy if you need something more descriptive for the public but want the shorter name to be used within admin areas, such as a person's record. Changing it there is not universal - it only affects that profile.
Remove a membership type from a record
If you have someone who has already gone through the process of registering for an account on your site, a record will automatically be added inside CiviCRM. Inside it at a minimum will be their email address. If you have attached other CiviCRM profile fields to your Drupal registration, those will be in their CiviCRM record as well.
Now how do you remove a membership to a record inside CiviCRM?
Go to CiviCRM in your site.
Click the "Search" menu and choose "find contacts". This will give you the simple search from for your database.
Input their name (if you collected it on your form) or email information into the search box. Then click search. You do not need to change the settings on any of the other drop down boxes. Note: You can leave the box empty and click search, which will bring up all records in your database.
On the search results page click on the name of the person you want to remove a membership from.
This will bring up the record for that person.

Note: If you aren't taking contributions and have replaced the word "contribution" site-wide with the word "membership", you may have two tabs that say "memberships". When we talk about the "Memberships" tab, we mean the second one.
Click the "Memberships" tab.
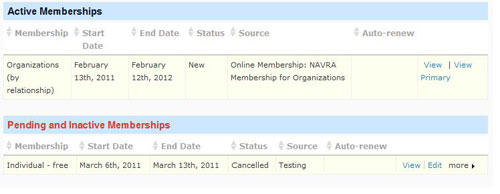
This will bring up all membership information for this record.
There will be an area that says "active memberships". This is all the active memberships for this record.
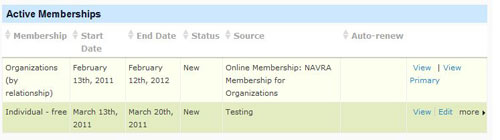
Click the "edit" link on the right side of the record. This will take you to the membership record.
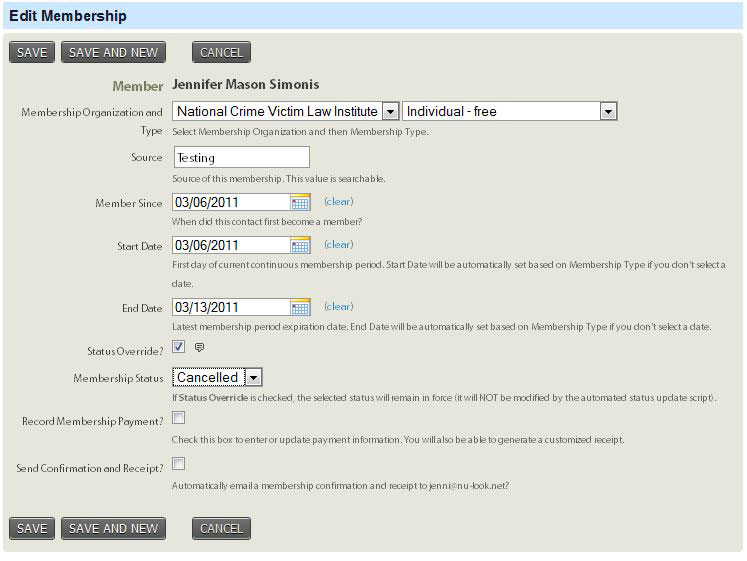
(click for larger image)
Input today's date as the end date for the membership.
Click the checkbox for "status override". This will let you cancel the membership.
Choose cancelled from the listing.
Click the save button.
This membership has now been cancelled.
If you have permissions on your Drupal site that are assigned based on Memberships, you may want to manually sync the Drupal and CiviCRM data so the permissions are removed immediately. Otherwise on most sites it will not happen until the person logs out and then logs back into the site.
To manually sync everything, go back to your Drupal menu. You can do this by clicking the "Home" menu item and choosing "Drupal menu".
Under "Site Configuration" choose "CiviMember Roles Sync". Then choose "Manually Synchronize".

By clicking the button on this page, any changes you made regarding membership in CiviCRM will be synced to roles and permissions on your Drupal site. You can run this anytime you make changes or you suspect that the automated sync has not run.
Searching for a record
A simple search
This will search for a record based on name or email.
Go to CiviCRM in your site.
Click the "Search" menu and choose "find contacts".
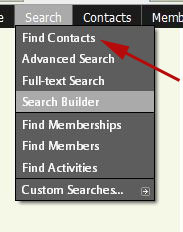
This will give you the simple search from for your database.

Input their name (if you collected it on your form) or email information into the search box. Then click search. You do not need to change the settings on any of the other drop down boxes. Note: You can leave the box empty and click search, which will bring up all records in your database.
After clicking search, you will get the search results page with a listing of all records that match your search terms.

(click for larger image)
On the search results page, click on the name of the person you want to add a membership to.
This will bring up the record for that person.
Advanced Search
This will allow you to search on more than just a person's name, such as memberships of a certain type, people who became members during a certain time, all records based on gender, etc.
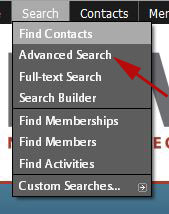
Click on the Search menu at the top and then select "Advanced Search."
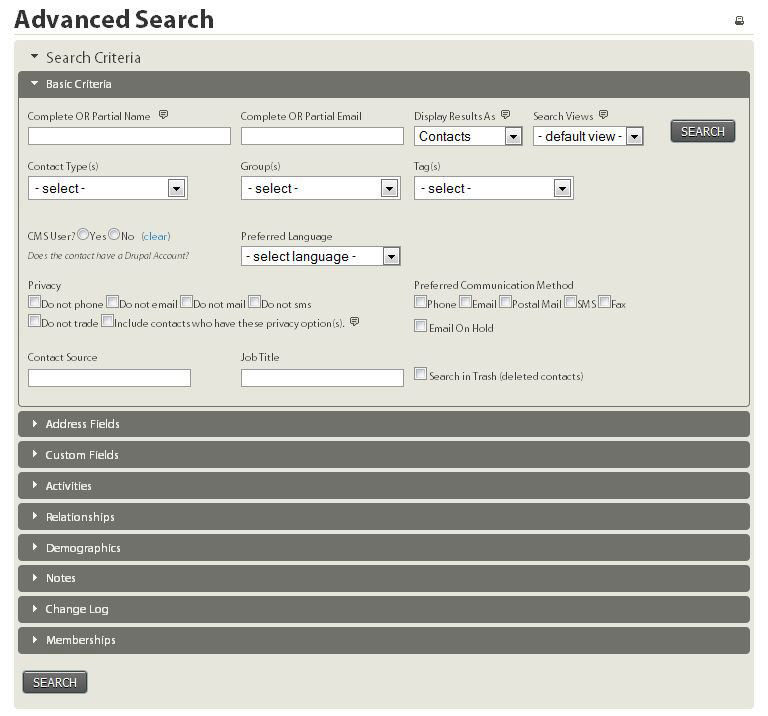
This will bring up the Advanced Search page, which gives you more options than the simple search page. Here you can search based on just about any field in a person's record as well as memberships between certain dates, contributions within certain dates, etc.
Just open up a collapsed area of fields and choose what you want to search on by clicking on the area's header. This will open/collapse areas, allowing you to search on a whole array of data.
Any fields you have added to the database beyond the standard fields will be listed under "Custom fields".
After clicking search, you will get the search results page with a listing of all records that match your search terms.

(click for larger image)
On the search results page, click on the name of the person you want to add a membership to.
This will bring up the record for that person.