Exporting is really handy for creating documents with your data or for importing into another system or database.
Run a search for participants.
Select the participants you want to export. You can choose to select all records by either choosing All x records ("All 4 records" in the below example) at the top of the list or the checkbox that is above the listing. You can also click the checkbox next to individual records to select them.
From the drop down for actions, choose the option to export.
Click Go
On the next page you'll be asked what fields you want to export. Chances are you want to select the fields. If you have previously saved a mapping, they will also be listed for you to choose from.
Click Continue
If you need to select which fields you want
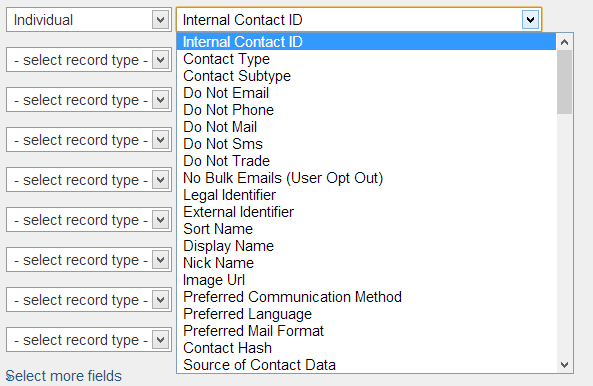
On the next page you will go through and select which fields you want to export.
The record types you'll probably use the most are either the Individual Record Type (name, address, phone, email, fields you've added about a person, etc.) and Participant (event they signed up for, how much they paid, etc.).
Once you choose a record type, then you are given a list of the fields available. FYI: For a quick way to get first and last name, choose "Display Name"

If this is an export you're going to do more than once, I recommend clicking the checkbox at the bottom that allows you to save the mapping. You'll then be asked for a name and optional description. This will save you from having to choose the fields every time.
Once you're done adding fields, click the export button at the bottom. This will download a .csv file that you can open in any spreadsheet program and can be used to do mail merge inside word processing programs.
If you are using a field mapping
Verify the fields you want are listed.
Once you are done, click the export button at the bottom. This will download a .csv file that you can open in any spreadsheet program and can be used to do mail merge inside word processing programs.

