
The specifics below are for the setup on one specific site; however, they may help you to generally better understand how your groups work. We can also recreate this same setup on your site.
How to add a new group
Click "Create content" at the top of your screen (the drop down only contains the most used items).
Choose "Coalition" from this page.
Here you will give the group a name, thumbnail, and introductory text (body). This body text is what shows up on the main page of the group.
Wait! Don't submit the page yet. We need to add it to the menu. If you accidentally already scrolled down and submitted the page, click the edit tab on the newly created group.
Scroll down and select the menu tab. Choose to "Provide a menu link". We'll now create a menu for your new group.
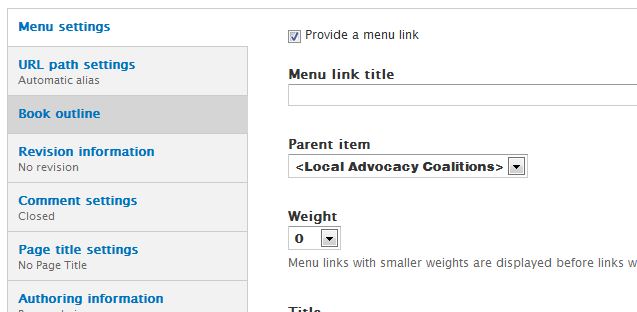
Menu link title is what will show in the side menu when in this section of the site.
Parent item for these on your site should be "Join or Start a Coalition" (you'll see all the other groups already under that section). You don't have to bother with weight - it's best done from the menu admin page so you can be certain that it's in the right place. The other options you can leave alone as well.
Go to the bottom and submit the page. The group (coalition) is now created.
On your site there are also sub-pages that show up as tabs at the top of the coalition area. We'll now add those to your new group.
Under "Create group content" you should see a link to add a Coalition Support Page. Click that.

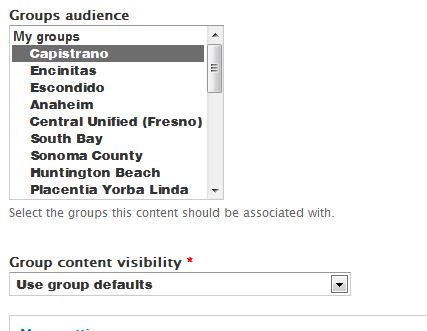
Coalition Support Pages are the ones that show up in the tabs at the top. Input the name of the page, the content for the page, and assign this page to a group. It may select the group for you automatically, but it depends on whether you clicked the link from within the group's page or from the create content page. So it's always best verify you have the right group selected.
Unfortunately the groups don't list in alphabetical order - they're in the order they were created. So you'll have to scroll to find your group. You don't need to change the visibility settings unless you want a private group.
Just like with the coalition page, you will need to add a menu item for this. Follow the same naming protocol as on the other pages (Resources, Take Action, etc.). This is the text that will show in the tab.
Scroll down and submit the page.
Your page is now created, and shows as a tab.
Repeat for all the other pages.
Now it's time to add the "News" tab and reorder everything properly.
Go up to the top menu and choose Structure >> Menus >> Local Advocacy Coalitions
Here you can drag items to be in the proper order. For the coalitions I've done it all so they're in alphabetical order.
After ordering everything, scroll down and submit your changes.
Now let's add the News page. It's the main page of the group, but the tab won't show up until you create it.
Click Add Link at the top.

The title of this will be News
The path will be the link to your new coalition you just created, such as: local_advocacy_coalitions/anaheim
Parent link will be the name of the coalition that this is being added to, such as Anaheim
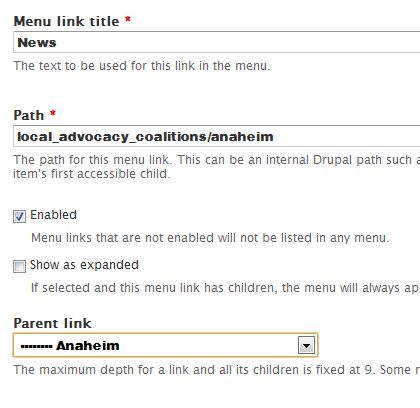
Leave all the other settings alone and scroll down to submit this.
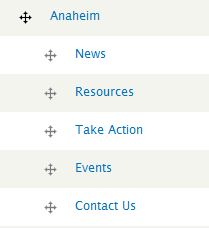
Now all you need to do is reorder the menu items under that section of the menu to ensure that "News" is listed first.
And that's it. Following these steps will allow you to create a new group, the sub-pages for that group, and add the tabbed links for the group.
