
Adding an image or file to your site is easy with the WYSIWYG editor. Both work almost exactly the same, as it is controlled by the same module.
Turn on your editor (if necessary)
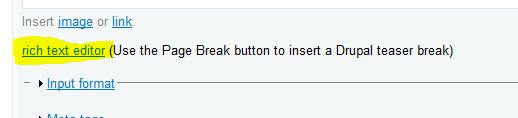
Some sites have the rich text editor disabled by default. If so, you will need to turn it on. Click on "rich text editor" under the text area you're working with (highlighted below in yellow). The exact wording may vary depending on which WYSIWYG editor is turned on for your site.
TinyMCE
The following instructions are for the TinyMCE editor. Buttons may vary depending on how yours is configured.
Adding an image
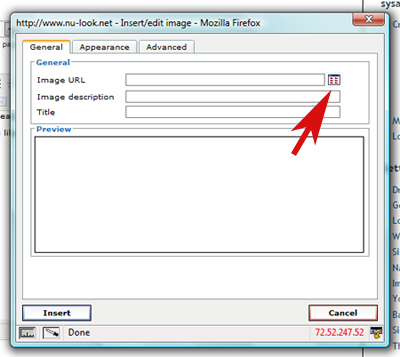
First, click on the icon that looks like a little tree.

This will pop up a window (see below). Click on the icon that looks like a file directory.
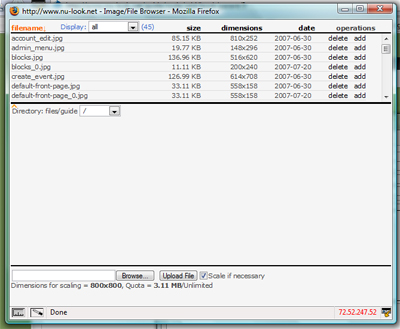
This will pop up another window where you can upload files.
(click for full sized image)
You can browse and upload additional files, or you can select a file that has already been uploaded.
If you'd like to organize your files into folders, you can create the folders via FTP and then use the drop down box under the file listing to select which folder you want to work with.
You can select the image you want either by clicking on add to the right of its name or clicking on the image's name and then clicking on the image when it pops up in that blank area in the box above.
You'll then be taken back to the first pop up window.
You have to input an image description. It's good to input a good, short description since Google and other search engines do pay attention to those.
If you want to align the image to the left/right or anything like that, click on the Appearance tab.

(click for full sized view)
Once you're finished, hit Insert and the image will be added to your page.
Adding a file
Adding a file works almost exactly like adding an image, except you'll need to highlight the text to be linked first, and then click on the button that looks like a link in a chain.

The rest works pretty much the same way - a window will pop up. Click on the directory button.
Browse and upload your file.
Click add to the right of the file's name to add it to your page.
You'll be taken back to the first pop up window. Here you can either hit Insert to finishing adding the link, or use advanced options like forcing the link to open in a new window (helpful if you're linking to a page outside of your own site).
CKEditor
The following instructions are for the CKEditor editor. Buttons may vary depending on how yours is configured.
CKEditor works very much like TinyMCE above, its buttons and pop-up are just a little different.
Highlight the text you want linked to the file. Then click on the button that looks like a globe with some chain in front of it:
When you click on this, a pop-up window will appear. Here you can either choose to upload a new file, link to a file already available, or link to a URL by pasting it into a text box:

Under the "target" tab you can also choose to have links open up in a way other than in the current browser window. For instance, if you want something to open in a new browser window (or tab), you'd choose New Window from the list of options on that tab.
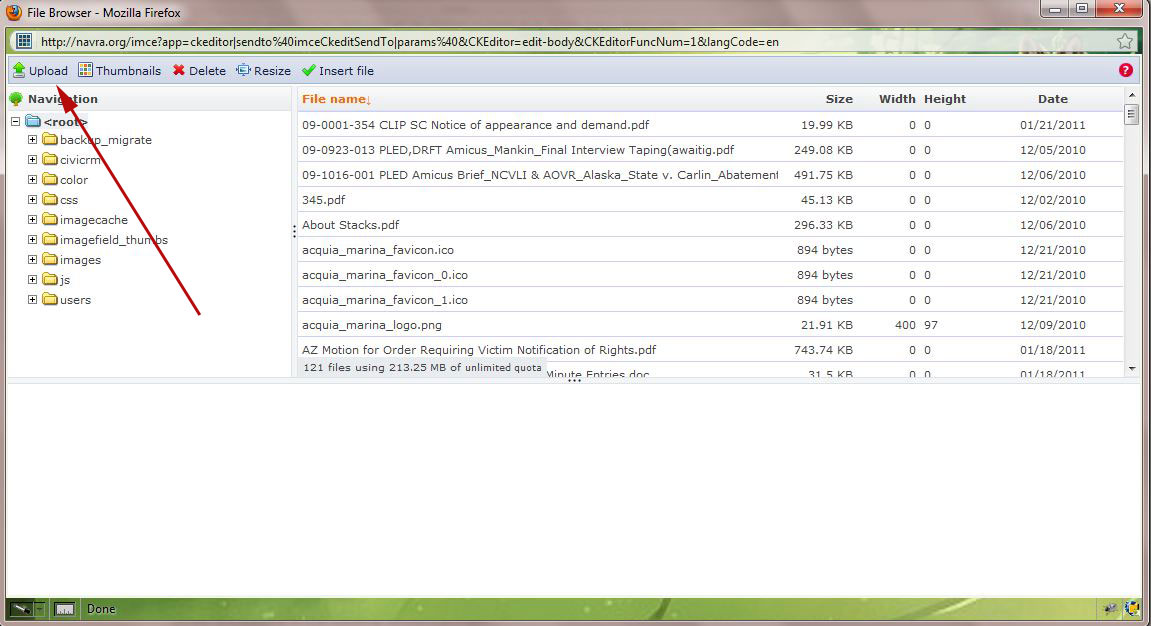
By clicking on "Browser Server", you will be taken to another pop-up window that shows all files in your files directory as well as the ability to add new ones.
The pop-up you receive will look something like this:
(Click for larger version)
If the file you need is already there, double clicking on its name will select it and take you back to the previous pop-up. You can hit "Ok" to close the window and add the link to the text or add additional options on the "Target" and "Advanced" tabs.
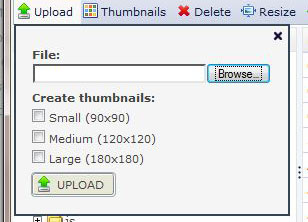
To add a new file, click on "Upload" in the top left corner of the pop-up. This will bring up an area to upload new files:
When you choose browse, you'll be taken to a file selection window where you can choose the file to upload.
Once it is uploaded, you'll go back to the file listing.
Double clicking on the file's name in the listing will select it and take you back to the previous pop-up. You can hit "Ok" to close the window and add the link to the text or add additional options on the "Target" and "Advanced" tabs.
This file will now be linked to the text (or image) you selected at the beginning of this excercise.
